Sewing Corner: Coffee Cozy

•October 14, 2012 • Leave a Comment

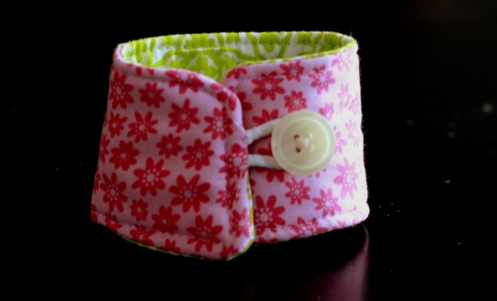
I love this project. It’s easy and quick, so it’s something I can easily accomplish in half an hour. Those are the best types of projects — near-instant gratification! I’ve learned I’m just not made for long-term projects that take weeks and weeks. I don’t have the patience and I like to see my results fast or I lose interest.

Hence, the coffee cozy. I’ve made about a zillion of these by this point. They make great gifts and are a fun way to use up scrap fabric. I used a pattern (found via Pinterest) from Liberate Creativity.

Slow Cooker Balsamic Chicken

•June 17, 2012 • Leave a Comment

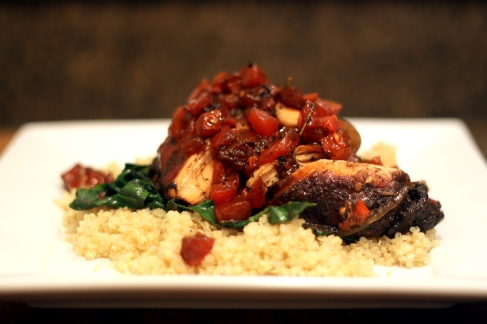
I found this recipe a few months back and have made it several times since. Mostly because it’s easy when I’m lazy, it’s fairly healthy, and it’s super versatile with what you can serve it with/under/on/etc. And anything healthy I can make in the Crock-Pot get two thumbs up from me!

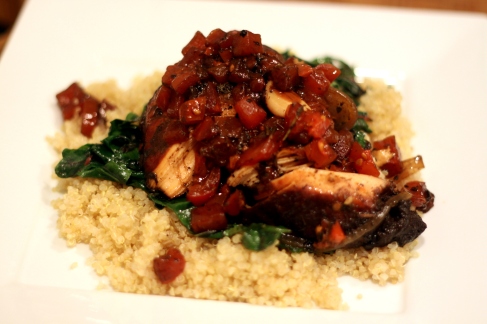
This first time (in the photos), we served over quinoa and sauteed Swiss chard, but it also works well on top of pasta or with roasted veggies.

Image

Image

Slow Cooker Balsamic Chicken

Very slightly adapted from Skinny Crockpot

4 to 6 boneless, skinless, chicken breasts (but since there’s only two in my household, I usually halve and use only two chicken breasts, or three if I want leftovers!)
2 large tomatoes, diced
1 onion thinly sliced
4 garlic cloves
1/2 cup balsamic vinegar
2 tablespoons olive oil
1 teaspoon each: dried oregano,basil, and rosemary
1/2 teaspoon thyme
ground black pepper and salt to taste

Pour the olive oil on bottom of your slow cooker. Place chicken breasts on top of oil, and sprinkle salt and pepper over chicken. Place sliced onion on top of chicken, then add garlic and herbs. Pour in vinegar and top with tomatoes.
Cook on high 4 hours.

Red Pepper Risotto

•March 29, 2012 • Leave a Comment

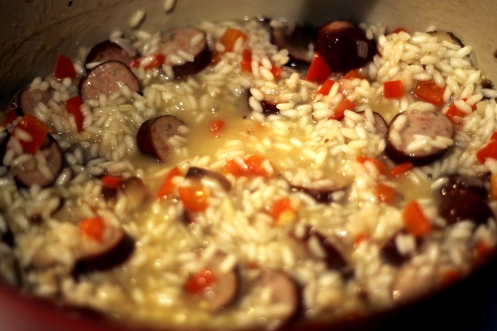
We made this back earlier this year on a cold night and it was delicious! We modified slightly to add some chopped apple chicken sausage for a little extra oomph. Other than that, stuck pretty close to the original recipe. I mean, it’s Pioneer Woman. You just don’t mess with perfection!


Red Pepper Risotto

Serves: 4
Recipe courtesy Pioneer Woman

8 cups chicken broth
3 tablespoons olive oil
1/2 medium onions, diced
2 red bell peppers, diced
1 3/4 cups arborio rice
3/4 cup dry white wine
Salt to taste
4 to 6 ounces goat cheese
1/2 cup grated Parmesan cheese (or any combo of cheeses)
1/2 teaspoon tumeric

Bring broth to a simmer in a medium pan. In a large skillet or dutch oven, heat olive oil over medium to medium-low heat. Add diced onions and cook until translucent, about 1 to 2 minutes. Add red peppers and cook for 8 to 10 minutes. Add uncooked rice and stir for a minute or two, allowing it to be coated with the other ingredients.
Pour in wine and cook for a minute or two.
Now, start adding broth a cup to a cup and a half at a time, stirring gently and allowing each addition to absorb into the rice. Repeat for 25 to 30 minutes, or until rice is al dente. (You might not need to use all the broth.)
At the end, stir in a little more liquid and turn off heat. Stir in turmeric if desired.
Add cheeses and stir. Serve immediately!

Soft, Fleece Blanket

•March 27, 2012 • 2 Comments

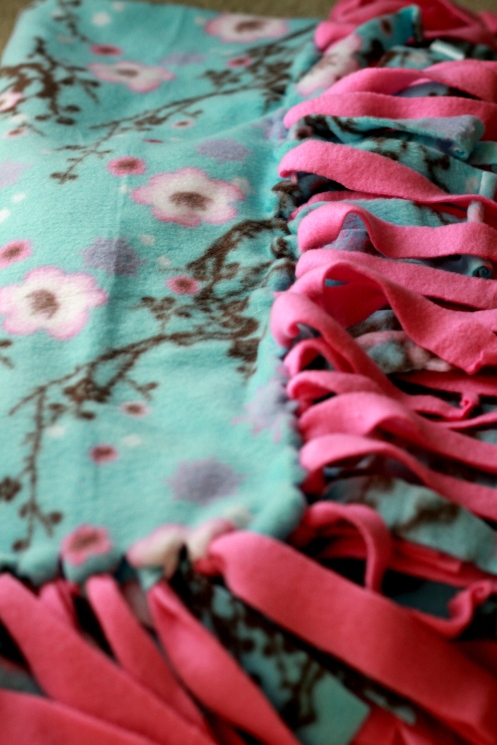
I’ve been wanting to try my hand at making a fleece blanket for a while now and couldn’t wait to make this soft, fleecey blankie for Baby M. (If you couldn’t tell, last year was definitely the year of babies among my friends!) I found these cute fleece pieces and got to work cutting and tying them together. I love the outcome, which was a much larger blanket than I usually make for babies (but might become my new standard size!) and was sooooo soft and cuddly. I might have to work with fleece more often!

Winter Vegetable Hash

•January 31, 2012 • 1 Comment

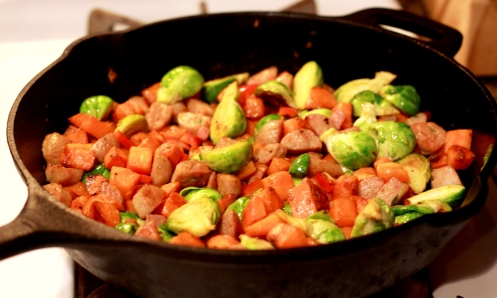
Why I love my husband: he cooks (and very well, too!), he likes to create recipes, he lets me steal them and post them here, his food is always yummy, and did I mention he cooks? (Don’t be to jealous…he definitely does NOT do the dishes.)

This is one of his best recipes to date. And we’ve already made it a handful of times, with different variations. This is the base, but it’s so easy to swap out ingredients based on what you have on hand (one of my favorite types of recipes).

We used Brussels sprouts, butternut squash, potatoes, chicken-and-apple sausage and Canadian bacon — delicious! But could easily swap for another type of squash or use sweet potatoes instead. Or turkey bacon (or real bacon!); really any type or meat and veggies you want. Yum!

Winter Vegetable Hash

4 tablespoons unsalted butter
1/2 onion, chopped
2 cloves garlic, minced
1/2 pound Brussels sprouts
1/2 butternut squash, peeled and chopped into 1-inch pieces
1/2 pound red new potatoes, chopped into 1-inch pieces
2 chicken-and-apple sausages, sliced into 1-inch pieces
4 slices Canadian bacon, chopped
Salt
Pepper

Melt butter in large skillet over medium-high heat. Add onions and garlic and saute until translucent, about 5 minutes.  Add Brussels sprouts, squash, and potatoes, and cook until tender, about 15 to 20 minutes. Test squash with fork until is slides easily through. Add sausage and bacon until cooked through, about 5 minutes. Season with salt and pepper and serve.

Wishin’ and Hopin’ and Quiltin’…

•January 30, 2012 • 4 Comments

This post has been a long, long time in the making. Quite literally.

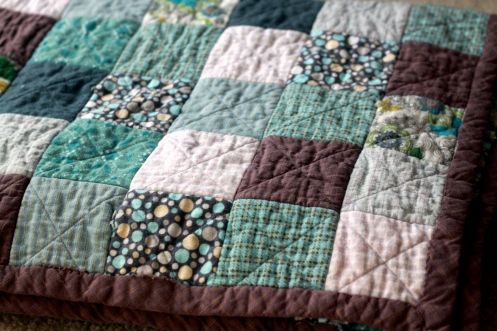
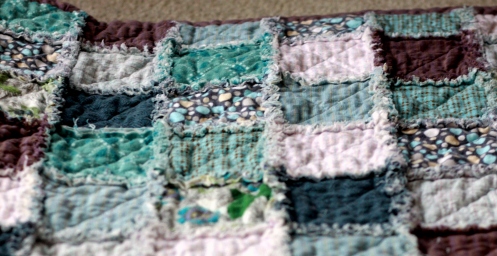
In August, my mom surprised me for my birthday with private sewing lessons to make the project of my choice. After much deliberation, I finally decided on a rag quilt. Quilting is huge and scary and intimidating and this seemed like a good intro quilt.

The hardest part was gathering the different types of fabric (all flannel) to use and determining the pattern to follow. All in all, it was a long labor of love but in the end, I’m so happy with the results.

Plus, it’s so cozy and warm (did I mention it’s all flannel?!), and a fun addition to our basket of blankets for wintertime — not that I’ve been able to use it at all lately in this 80 degree summertime weather we’re having in January (don’t hate).

Love! I doubt I’ll be making another one anytime soon. I need a break from my machine for a while! But it was a fun one. 🙂

Balsamic Pasta Primavera

•January 24, 2012 • Leave a Comment
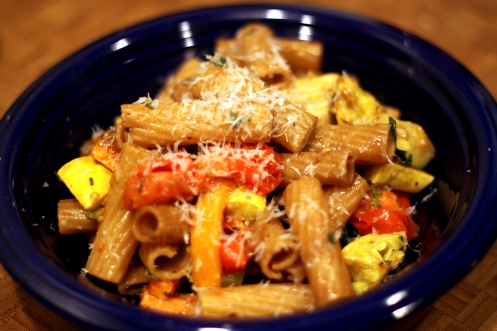
This became one of our favorite recipes last fall and we’ve made it several times since. It’s a great way to use up extra veggies and clean out the fridge at the same time. Plus, it’s delicious! The balsamic and roasted vegetables are a perfect flavor combo. My mom passed on this recipe to me and it’s quickly become a new favorite. Easy, healthy, delicious — holy trinity!
Balsamic Pasta Primavera
1 package whole-wheat penne pasta
1 yellow squash, chopped
1 zucchini, chopped
1 carrot, julienned
1/2 red bell pepper, julienned
1/2 pint grape tomatoes
1 cup fresh green beans, trimmed and cut into 1-inch pieces
5 spears asparagus, trimmed and cut into 1-inch pieces
1/4 cup olive oil, divided
1/4 teaspoon salt
1/4 teaspoon coarsely ground black pepper
1/2 tablespoon lemon juice
1 tablespoon Italian seasoning
1 tablespoon butter
1/4 large yellow onion, thinly sliced
2 cloves garlic, thinly sliced
2 teaspoons lemon zest
1/3 cup chopped fresh basil leaves
1/3 cup chopped fresh parsley
3 tablespoons balsamic vinegar
1/2 cup grated Romano cheese
Preheat oven to 450 degrees F. Line a baking sheet with aluminum foil. Bring a large pot of lightly salted water to a boil.
Add pasta and cook 10 to 12 minutes or until al dente; drain. In a bowl, toss squash, zucchini, carrot, red bell pepper, tomatoes, green beans, and asparagus with 2 tablespoons olive oil, salt, pepper, lemon juice, and Italian seasoning. Arrange vegetables on the baking sheet, and roast 15 minutes, until tender.
Heat remaining olive oil and butter in a large skillet. Stir in the onion and garlic, and cook until tender. Mix in cooked pasta, lemon zest, basil, parsley, and balsamic vinegar. Gently toss and cook until heated through. Remove from heat and transfer to a large bowl.
Toss with roasted vegetables and sprinkle with Romano cheese to serve.

Sewing Project: Child’s Apron

•January 23, 2012 • 2 Comments

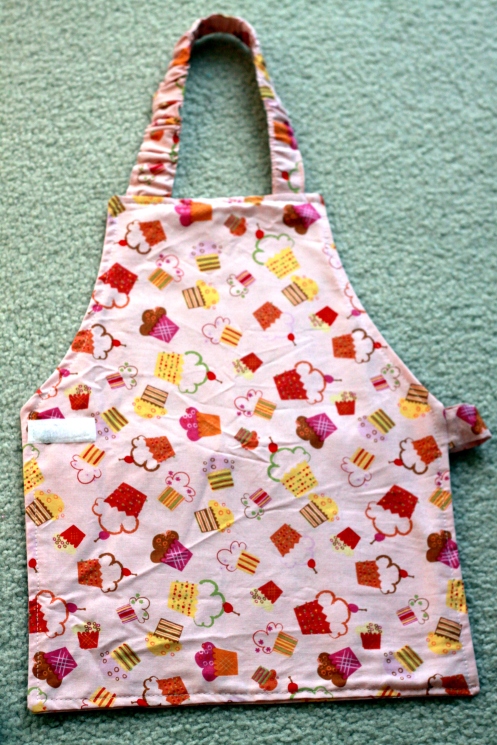
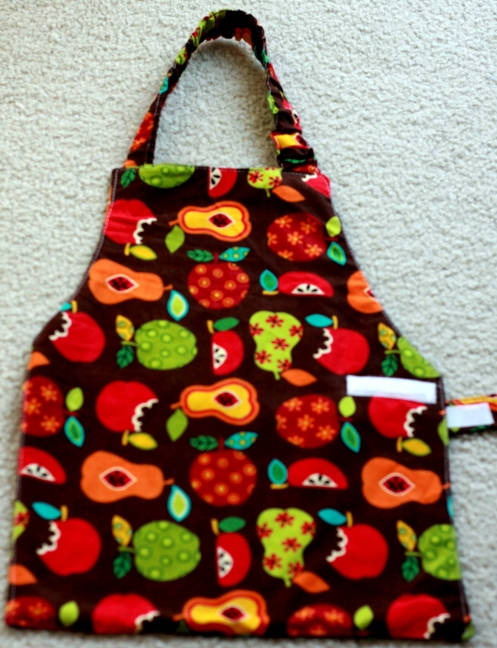
I finally felt brave enough this year to sew homemade holiday gifts for a few people. After a bit of trial and error, most everything worked out pretty well (phew!). Without a doubt, these child-size aprons were my favorite projects to work on — especially since they were gifted to two of my favorite pint-sized little girls.

After a bit of googling, I settled on this pattern for a wee apron. What I love about the pattern is that it’s Montessori and so geared toward helping kids independently put the aprons on themselves, with the help of a Velcro waist strap and elastic neck strap to easily lift over the head.


Hope the apprentice bakers enjoy their new threads!

Leftover Turkey Pot Pie

•December 9, 2011 • 1 Comment

Thanksgiving is always my favorite holiday. Partially because there are no gifts, no pressures, just a (generally) relaxing day spent with family and friends and feeling thankful. And partially because of the delicious food. What? I’m a total foodie at heart.

This year we did three Thanksgivings. The last one was just for us. We decided to get a big turkey and cook it up for the fun of it and for the leftovers. Instead of the 12-pounder we got last year, I came home to find a 20-pound bird in my fridge. Yes, 20 pounds. Who was coming to dinner, you ask? Dozens of people, surely. Nope, just a happy foursome and a wee one who doesn’t yet have teeth so didn’t get to partake in the poultry.
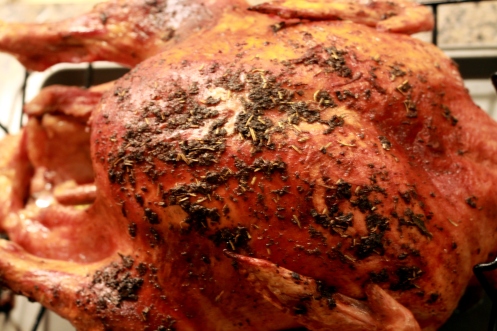
Once again, as last year, we went with Bobby Flay’s turkey recipe. It creates the crispiest, tastiest skin and moist, light turkey. Yum!

So, needless to say, we had three delicious turkeys throughout Thanksgiving week, and somehow ended up with leftovers from four turkeys. But no one was complaining. Turkey leftovers are a favorite around here! We’ve made turkey enchilada pie, turkey tetrazzini, and … time for turkey pie!

I went directly to the best source for this one and used Sam the Cooking Guy’s recipe for Turkey Pie — with a few small adaptations.
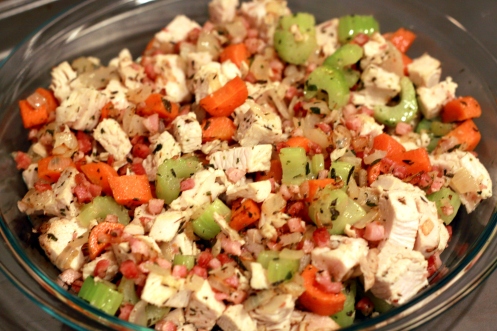
Isn’t she a beaut?
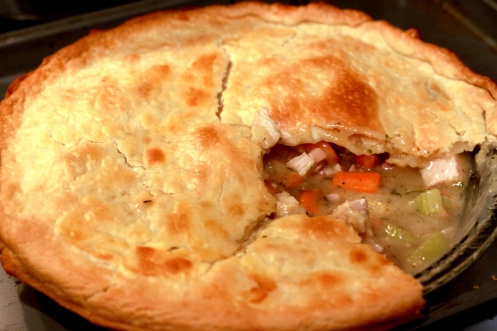
Turkey Pot Pie

Recipe courtesy Sam the Cooking Guy (somewhat adapted)

1 ready to bake refrigerated pie crust
2 cups diced, cooked turkey
3 carrots, sliced
8 ounces pancetta, diced
2 stalks celery, chopped
1 small onion, diced
1 tablespoon sage
3 tablespoons flour
4 tablespoons butter
2 cups chicken broth
1 tablespoon Worcestershire sauce

Preheat oven to 450 F. Saute onions, carrots, celery, sage and pancetta in 1 tablespoon of the butter until softened. Add turkey to mixture and put into pie plate. In same pan, melt remaining butter while stirring in flour. Stir in broth slowly to make a thick sauce and add Worcestershire. Pour over turkey mixture. Top with crust and brush top with milk. Bake until top is golden brown, about 20 minutes, and serve.

Best Chocolate Chip Cookies Ever

•December 8, 2011 • 1 Comment

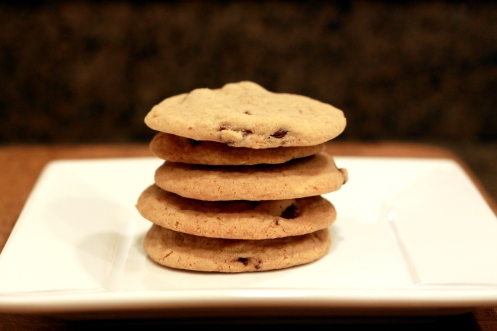
I came across this recipe on Pinterest (where, it seems, I find everything lately) and the original pinner had written: “The fluffiest, chewiest, most amazing chocolate chip cookies.”

Well, that seems like enough for me! I knew I had to try these out at once. And I can say that the recommendation was totally true. These really are the best chocolate chip cookies. I am hanging onto this recipe forever!

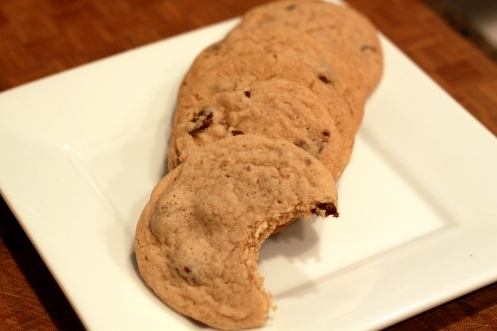
So good I couldn’t resist a bite!

Best-Ever Chocolate Chip Cookies

Recipe courtesy Apple a Day, who adapted it slightly from Anna Olson, Food Network Canada

3/4 cup unsalted butter, softened
3/4 cup brown sugar
1/4 cup sugar
1 egg
2 teaspoon vanilla extract
2 cups flour
2 teaspoons cornstarch
1 teaspoon baking soda
1/2 teaspoon salt
1 cup bittersweet chocolate chips (I used semisweet)

Preheat oven to 350 degrees F. Using mixer, cream together butter and sugars until fluffy and light in color. Add egg and vanilla and blend in. Mix in flour, cornstarch, baking soda and salt. Stir in chocolate.

Drop dough onto a prepared baking sheet.  Bake for 8 to 10 minutes, until barely golden brown around the edges.  Tops won’t be brown. Don’t bake longer than 10 minutes (this ensures that delicious softness). Cool, on the sheet, on a wire rack for 5 minutes.  Remove from baking sheet and let cool completely.